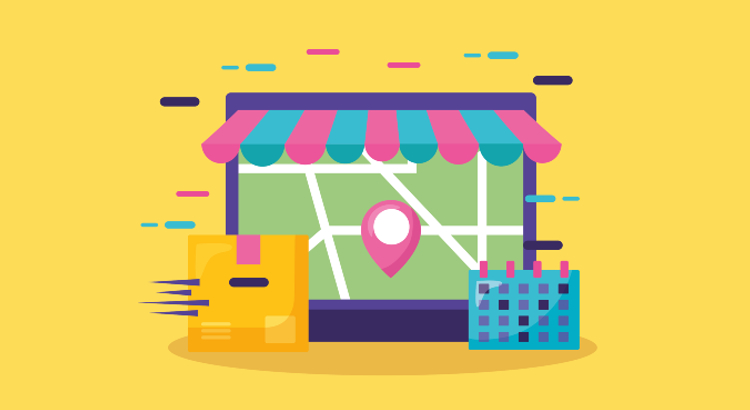
Google My Business, which is now known as Google Business Profile, enables business owners to connect with consumers through Google Search and Google Maps.
Maintaining a Business Profile enables you to increase your visibility on Google, acquire credibility through reviews, and have complete control over your business information.
Let’s begin by discussing the fundamentals of Google Business Profile, formerly Google My Business.
What Is Google My Business?
Google Business Profile (GBP) is a free utility that enables you to control how your business is displayed on Google Search, Google Maps, and Google Shopping.
This tool enables you to interact with customers, list products and services, and more.
Even if you do not have a storefront, you can still have an account if you have customer contact.
As an example, a plumber may only visit clients in their homes. However, he can maintain a Google Business Profile.
Is Google Business Profile Free?
Creating and managing your Google Business Profile is completely free.
And you can benefit greatly without spending a dime.
What Are the Benefits of Google My Business?
Maintaining a Google Business Profile has six primary advantages. Let’s examine each in greater depth.
1. Informs the Public
You can use your GMB account to share your location and business details with your audience.
It includes specifics such as:
- Opening Times: Your business’s opening time and daily operating hours
- Address: A connection to your company’s location on Google Maps
- Contact Details: Your phone number so customers can contact you
- Customer Reviews: Customer reviews are comments left by previous customers. In these online reviews, individuals can rate your company out of five stars.
- Business Category: Specify the type of business you operate. The options included are restaurant, cinema, nightclub, and more
Although you can modify these details at any time, it is best to be consistent. It maintains your reputation in the eyes of potential consumers.
2. Helps You Interact with Your Customers
A GMB account enables you to interact individually with your consumers.
Here are some of the ways a GMB account facilitates interaction between your business and new customers:
- Direct Messaging: Individuals can contact you via your profile, and you can respond to inquiries.
- Reviews: Customers can give you a rating out of five stars for your service. They can leave negative or positive evaluations for others to see on your profile.
- Orders: GMB accounts facilitate food and reservation orders. If you operate a restaurant, your consumers can make reservations and place orders directly from your business profile.
- Connect via Social Media: Google attaches your website to your social media profiles. These profiles include YouTube, Facebook, Twitter, and LinkedIn.
Google assists you in managing your online consumer interactions.
Suppose a consumer with dietary restrictions wishes to dine at your restaurant. This customer can submit queries via Google My Business, and you can respond to them.
Upon a positive response, the customer can order via the GMB account and also assess your service.
Google will do everything else with only your business website as input.
Related Article: How to Create a Landing Page That Converts?
3. Promotes Your Products and Services
Support for promotional incentives is one of the top Google My Business benefits.
It is crucial to keep your customers informed about your business. A promotional sale is one method for achieving this objective. However, publicizing the sale can be costly.
A Google business profile facilitates this for free. It informs consumers of the location and duration of the promotion.
Google Posts offers several opportunities for business promotions.
Events
Events can be used to schedule sales and promotions.
Events can be promoted both online and offline. Suppose you are in charge of a local art gallery’s exhibition. You can schedule this with a designated event to inform people of the time and location.
You can even enable individuals to RSVP and purchase tickets via your event posting.
Offer Pages
Offer pages are ideal promotional materials for businesses of all sizes. They assist you in bringing your bargains and special offers to the forefront of your business profile.
They are similar to billboards for your Google My Business account, where you can promote your most valuable offers to attract consumers.
With such offers, you can entice consumers to make spur-of-the-moment purchases.
General Posts and Updates
Google Posts can also be used for generic posts and updates.
Is Christmas approaching? Share your holiday schedule.
Have you encountered a heartwarming story? Share it with others.
Consider it your company’s social media feed. Similar to social media, you can use it to establish your company’s tone. You can display accomplishments, staff stories, and consumer feedback.
4. Improves Local SEO
Google My Business contributes to search engine optimization (SEO), especially local SEO.
How?
Google selects three service providers from local Google My Business profiles when a customer queries “[Service] near me.”
These local search results from a service area depend on the following factors:
- The prominence of a business
- Distance from the searcher’s current location
- The relevance of the search terms to the enterprise
As a GMB profile is required for these results to appear, you should optimize your GMB for local SEO.
5. Provides Traffic Insights
You can optimize your business strategy to increase customer conversion.
A GMB account can assist you with this by providing insights into your visitors’ search behavior, such as whether they sought out your services or landed on your business by accident.
The insights classify your visitors as follows:
- Discovery: Includes searchers who discovered your company by seeking for its products or services
- Direct: Counts searchers who look for your company by its name and address
- Branded: Search factors centered on your brands or brands associated with your business
- Total: Displays the total number of inquiries
Use this information to revise your GMB listing. Also, optimize Google Ads for your digital marketing.
6. Enables You to Manage Your Brand
Even if you are at the top of the rankings, searchers will examine your business profile before deciding whether or not to engage with you.
A positive or negative profile influences purchasing decisions.
You can enhance your reputation by:
- Responding to queries from searchers
- Offering precise and pertinent business information
- Creating social media posts to demonstrate concern for site visitors
- Responding to negative comments and resolving problems
Useful Article: Tips to Enhance Brand Awareness Through Paid Search
How to Set Up Your Google Business Profile from Scratch
If your Business Profile already exists and you only need to declare it, proceed to the following section. If not, you must start from the beginning; follow the steps below:
Step 1: Go to Google Maps and Add Your Business
To begin, navigate to Google Maps and access the menu by clicking the button in the page’s upper-left corner.
Look for the “Add your business” icon on the menu.
Step 2: Create Your Business Account
Sign in to your account if you already have a business account and bypass this section.
Follow along to create a new account if you do not already have one.
Choose “To manage my business” from the drop-down menu after clicking the “Create account” option.
Then, enter your information (such as your name, preferred alias, etc.) and press the “Next” button.
Following that, you will be required to authenticate your identity via phone number.
Google will then direct you to their terms and conditions page after requesting a few additional details.
On the terms and conditions page, click “Agree” to begin setting up your profile.
Step 3: Fill Out Your Business Name and Category
Now is the time to create a Business Profile. Choose a name and category for your business as the initial phase.
First, input your company’s name. Google will display a list of existing enterprises from its database as you type.
If your company is on the list, continue to the next section to find out how to claim it. If not, type out your company’s name in full.
Write your business name exactly as it appears. (Don’t attempt to stuff your business name with keywords or Google may suspend your account.)
Next, begin typing your business category and select one from the drop-down menu:
Your business category informs Google of the nature of your company, making it more searchable.
You can modify your business category or add additional categories at any time.
Step 4: Add Your Location
Add a location if your business has a tangible location. Adding a location is usually optional, but certain business categories, such as “Restaurant,” necessitate it.
If you do not have a storefront, select “no” to proceed.
If you select “yes,” Google will request the address of your location. Google Maps will display your address, so be careful to enter an accurate location.
Google employs your address to provide you with a list of possible duplicate listings.
If one of the duplicate listings is your business, continue to the following section to learn how to claim it. Alternatively, select “None of these.”
Step 5: Choose Your Service Area
If you add a business address, this phase will display differently.
If you specify a business address, you can skip this step. Google will inquire whether or not you offer deliveries or home and office visits.
Select “Yes” to inform searchers of the areas within your reach.
Select “No” to proceed to the next step.
If you did not include a business address, you cannot bypass this step. Simply select a region from Google’s suggestions, or begin composing the name of the region you serve.
Step 6: Add Your Contact Information
Next, include your phone number and website address, if applicable.
Searchers will locate and contact you using the contact information you provide, so double-check that it is accurate.
Step 7: Opt into Updates and Recommendations
Google will now inquire as to whether you wish to receive updates and recommendations for your GBP. We recommend selecting “yes” so you can hear directly from Google about best practices.
Step 8: Verify Your Listing
Your Business Profile will not be searchable until it has been verified. Even though you have the option to skip business verification during initial setup, you will ultimately be required to verify your listing.
There are five methods for validating your listing:
- By phone. Google will send you an automated phone call or text message with your verification code.
- By email. You will receive an email with your verification code attached.
- By postcard. You will receive a postcard with your verification code at your registered address.
- By video recording. Record a video that demonstrates your business’s location, its equipment, and that you are an authorized manager.
- By live video call. Display the same evidence as the video recording but during a live call with a support agent.
Your verification alternatives vary depending on whether or not a location has been added. If your business has a physical location, you must authenticate it via postcard.
When authenticated into your account, you will enter the five-digit code found on the postcard.
If your business lacks a tangible location, you will be required to provide your home address for verification purposes.
You can then choose between receiving a phone call, a text message, or “Other options.”
How to Claim an Existing, Unverified Listing?
Google automatically generates and updates corporate information. Therefore, Google’s database may already contain an unmanaged, unverified listing of your business.
You only need to claim and submit your listing to your dashboard.
Claiming your listing will enable you to maintain the accuracy of your business information, post announcements, and respond to customer reviews and inquiries.
Here are the four straightforward steps:
Step 1: Search for Your Business on Google Maps
Start by visiting Google Maps and searching for your business.
If you cannot locate your business on Google Maps, the listing likely does not exist. Therefore, you must create one from the beginning. (See the preceding section for a detailed guide.)
Step 2: Look for the “Claim this Business” Button
After locating your company on Google Maps, search for the “Claim this business” or “Own this business?” button.” link.
If neither of these controls can be located, one of two things has occurred:
- The listing is already verified. To claim a verified listing, you must contact the current business administrator. Proceed to the following section for a comprehensive step-by-step guide.
- You are already the profile manager. Sign in to your Google account and navigate to the Business Profile Manager dashboard to determine if the listing has been assigned to your account.
Step 3: Click “Manage Now”
On the following page, there is a “Manage now” icon. If you are certain that the business listed is yours, click the icon.
Click “I own or manage another business” to create a new listing if you discover the business is not yours.
Step 4: Verify Your Business
Verifying your business demonstrates to Google that you administer the business listing you’re claiming.
Google won’t let you administer your listing (i.e. respond to reviews or edit information) until you’ve verified ownership.
You can again confirm your listing via phone, email, postal mail, a recorded call, or a live contact.
Once you have confirmed that the business listing is in fact yours, you will be able to administer it via your GBP Manager dashboard.
How to Request Access to a GBP Managed by Someone Else?
If you are unable to locate the “Claim this Business” option on your existing business listing, it is likely that it is already managed by another account.
In three simple actions, you can reclaim the profile:
Step 1: Go to the Create Page
Visit the Create page and seek for your organization.
You should see a drop-down menu containing existing Google database listings. Select the company listing you wish to claim.
Step 2: Request Access
Google will validate that another email address is the owner of the listing you wish to claim.
If the email address is yours, you should be able to access the listing by signing into it. If you’ve lost the login information for that email address, consult Google’s Account Recovery guide.
If the email address does not belong to you, click the “Request Access” icon.
Step 3: Fill Out the Form
Google will then ask you to provide some personal information, such as your name, phone number, the level of access you require, and your affiliation with the business.
The account holder who manages your listing will receive your request after you click submit. They then have three days to either approve your request or deny it.
If you do not receive a response, you may have been granted permission to claim your own profile. Find the option to claim your business on your GBP manager dashboard.
Seven days after you become the new proprietor, Google will grant you complete management access to your new business listing.
How to Optimize Your Google My Business Profile?
After creating or claiming your listing, it is time to optimize it. Here are ongoing measures you can take to keep your Google Business Profile optimized.
Review NAP Consistency
The NAP is the most essential piece of information in your Google My Business profile. It represents name, address, and telephone number.
NAP consistency assists potential clients in locating and identifying your business. It is essential to maintain this consistency everywhere your business appears online in order to avoid confusion.
Start by verifying that your business account is in order.
Check the “Info” tab to ensure that your company’s name, address, and phone number are correct.
Manually managing your business information in local directories is possible, but inefficient.
Numerous SEOs also employ call tracking or the use of various phone numbers that forward to your business number. This allows you to determine which channel the communication originated from.
Here’s how to implement call tracking without compromising NAP consistency:
Return to the “Info” section of your Google My Business profile and locate the phone number field.
Add your call tracking number as the “primary phone” and your business’s conventional phone number as the “additional phone”
By adding your primary phone number as an auxiliary number, it will remain connected to your business without compromising the consistency of your NAP.
Write a Business Description
You can include information about your company’s products and services, as well as its history, in business descriptions.
Google suggests that you use your Business Description to provide beneficial information about your products and services, as well as your company’s mission and history.
Focus on providing a pertinent description rather than stuffing as many keywords as possible into the text.
Google provides the following additional advice on what not to include in your business description:
- Incorrect or unclear information
- Offensive language
- Specials and promotions
- Misspellings, gibberish, or the use of gimmicky characters
Read the complete list of Google guidelines for representing your business on Google
Add Images to Your Listing
Now that you have a Business Description, you should include images to help you stand out.
First, upload a profile image (typically your logo) and a cover image that best represents your company. Additionally, you can contribute additional business images to your Google My Business listing.
Exterior photographs, interior photographs, product photographs, photographs of your team at work, and photographs of common areas are a few examples of business photographs that should be included.
Here are GBP’s specifications for photo size:
- File size: Between 10 KB and 5 MB
- Profile photo: 250 x 250 px
- Cover photo: 1080 x 608 px
- Google posts: 1200 x 900 px
- Business photos: 720 x 720 px
- Format: JPG or PNG
Create Google Posts
Google Posts allows you to publish offers, events, products, and services directly to Google Search and Maps. You can locate them in the “From the Owner” section near the bottom of the Business Profile.
Posts may contain text, images, or videos. The following categories of Google Posts can be created:
- Offers: Promotional sales or discounts from your company. Include a title, beginning and ending dates, and an image or video. Can also include a coupon code, a link, and details about the offer.
- What’s New: General business updates (or links to your most recent blog posts). Include an image or video, a description, and a call-to-action icon.
- Events: Event marketing for your company. Needs a title, beginning and ending dates, and a time. Includes a description, an image or video, and a call-to-action icon.
How to create a post:
- Step 1: Sign in to your GBP manager account and navigate to the “Posts” tab.
- Step 2: To create a new post, click the icon in the bottom right corner of the screen.
- Step 3: Select the desired post type from the drop-down menu at the top of the page.
- Step 4: Write your post and put images in the provided spaces. This is an example of a “What’s New”-style post.
- Step 5: Optionally, you can add a button to facilitate consumers’ access to your website, order placement, and other actions. After selecting the desired icon type, a link must be added. Here is where visitors will be directed upon clicking the icon.
- Step 6: Click the “Preview” icon in the lower-right corner of your browser to see how your post will appear when it goes live. If necessary, make modifications.
- Step 7: When everything appears to be in order, click the “Publish” icon in the lower right corner of the window. Your message will appear within your GBP.
To maximize the effectiveness of your Google Posts, include high-quality images and post frequently.
The duration of a post is seven days (unless you choose an “Event” post and specify a longer duration). Due to the fact that only a few posts are visible at once, there is no advantage to having more than two active posts at once.
Also, be sure to maintain brevity and succinctness. Technically, you can include up to 1,500 words, but only 75 to 100 characters appear in the preview.
Therefore, it is essential to include any important information at the outset. For example, event dates, offer information, and business updates.
Feature Products on GBP
Highlight a curated inventory of products directly on your business listing by using the Product Editor in Google Business Planner.
Create collections containing a minimum of three products, complete the required information, and your users will be able to click on individual products for additional information.
Product Editor is designed for small to medium-sized enterprises and sole proprietorships in the majority of industries. In contrast, restaurants can utilize the Popular Dishes feature.
Here’s how to add an item:
- Step 1: Sign into your Business Profile account, then navigate to the “Products” tab.
- Step 2: Click the “Add product” icon located near the page’s top.
- Step 3: In the pop-up window, upload an image of your product and identify it.
- Step 4: Select a product category or create a new one by scrolling down.
- Step 5: Optionally, you can add the item’s price and a brief description in Step 5.
- Step 6: We recommend selecting an icon from the list and linking it to your website in the sixth step. Including an icon in your GBP facilitates searchers’ access to your product page.
- Step 7: Click the save button to finish. Up to 30 minutes may pass before your products become visible to consumers.
Remember that recently edited items will appear first on your listing.
Respond to Reviews
It is essential to monitor your evaluations, as they are one of the first results that appear when someone Googles your business name. Therefore, Google evaluations have a significant impact on the reputation and perception of your business.
You can manually verify your reviews when logged into your GBP account if you prefer.
It is against Google’s terms of service to offer incentives in exchange for user reviews.
You can however remind them to leave feedback by including a link in emails, on invoices, or at the conclusion of a chat session.
Log into GBP and navigate to the “Get more reviews” section of the Home tab to obtain the link for your customers to leave reviews.
Then, within that section, select the “Share review form” button.
The link to your review form will appear in a pop-up window. Copy it and distribute it to your clients.
Add Questions & Answers
By posting the answers to frequently asked customer questions directly to your profile, you can provide vital information upfront. Customers can also submit queries.
Ensure that you are on top of any inquiries from consumers. This will not only provide your customers with more current information about your company but also help develop your reputation and credibility.
To locate these queries, conduct a Google Maps search for your business.
Choose your store, and then navigate down to the “Questions & Answers” section of your GBP.
Select the “More questions” link.
The “Others are asking” section at the top of the page contains a carousel of unanswered questions and a list of answered questions below it.
Click the “Answer this question” or “See all answers” icons at the bottom of each question box to submit responses.
If you discover incorrect or out-of-date responses, post the correct response. Then, select the three dots beside the incorrect response to report it.
Additionally, you can post your own queries. Consider this a FAQ page.
Suppose you manage a restaurant. Many customers probably question if you offer delivery. Instead of waiting for a customer to pose the question, post it on your personal account and respond to it yourself.
Sign in to your personal Google account, then conduct a Maps search for your business.
Enter your query in the “Questions and answers” section of your GBP.
Use your business account to respond to the query.
Keep in mind that Google users can also publicly answer questions, so it’s best to remain on top of incoming questions. This way, incorrect responses to business queries can be avoided.
Select Highlights & Attributes
Utilizing attributes (or highlights) is an effective method for highlighting the distinctive aspects of your business.
To add attributes, click the “Info” tab on your Business Profile and then scroll down to the “From the business” section.
To make changes, click the pencil icon in the upper-right corner. The available options may vary based on the nature of your business.
The available options may vary based on the nature of your business.
Select any applicable options for your organization, then click “Apply.”
Your updates may take up to three days to be published.
Frequently Asked Questions
Do You Need to Have a Physical Address to Use GBP?
A physical address is not required to administer a Google Business Profile.
In addition to businesses with storefronts, mobile businesses are also eligible.
For instance, most plumbers do not maintain a storefront or office, but they can still administer a Google My Business Page.
You must provide an address when creating your account, but you do not have to make it public.
In short, if you interact in person with customers, you are eligible to operate a Business Profile.